

My daughter and I made these cute little Minion Twinkie Valentines for her class party. They were so quick and easy I put together a tutorial so you can make some too!
You will need:
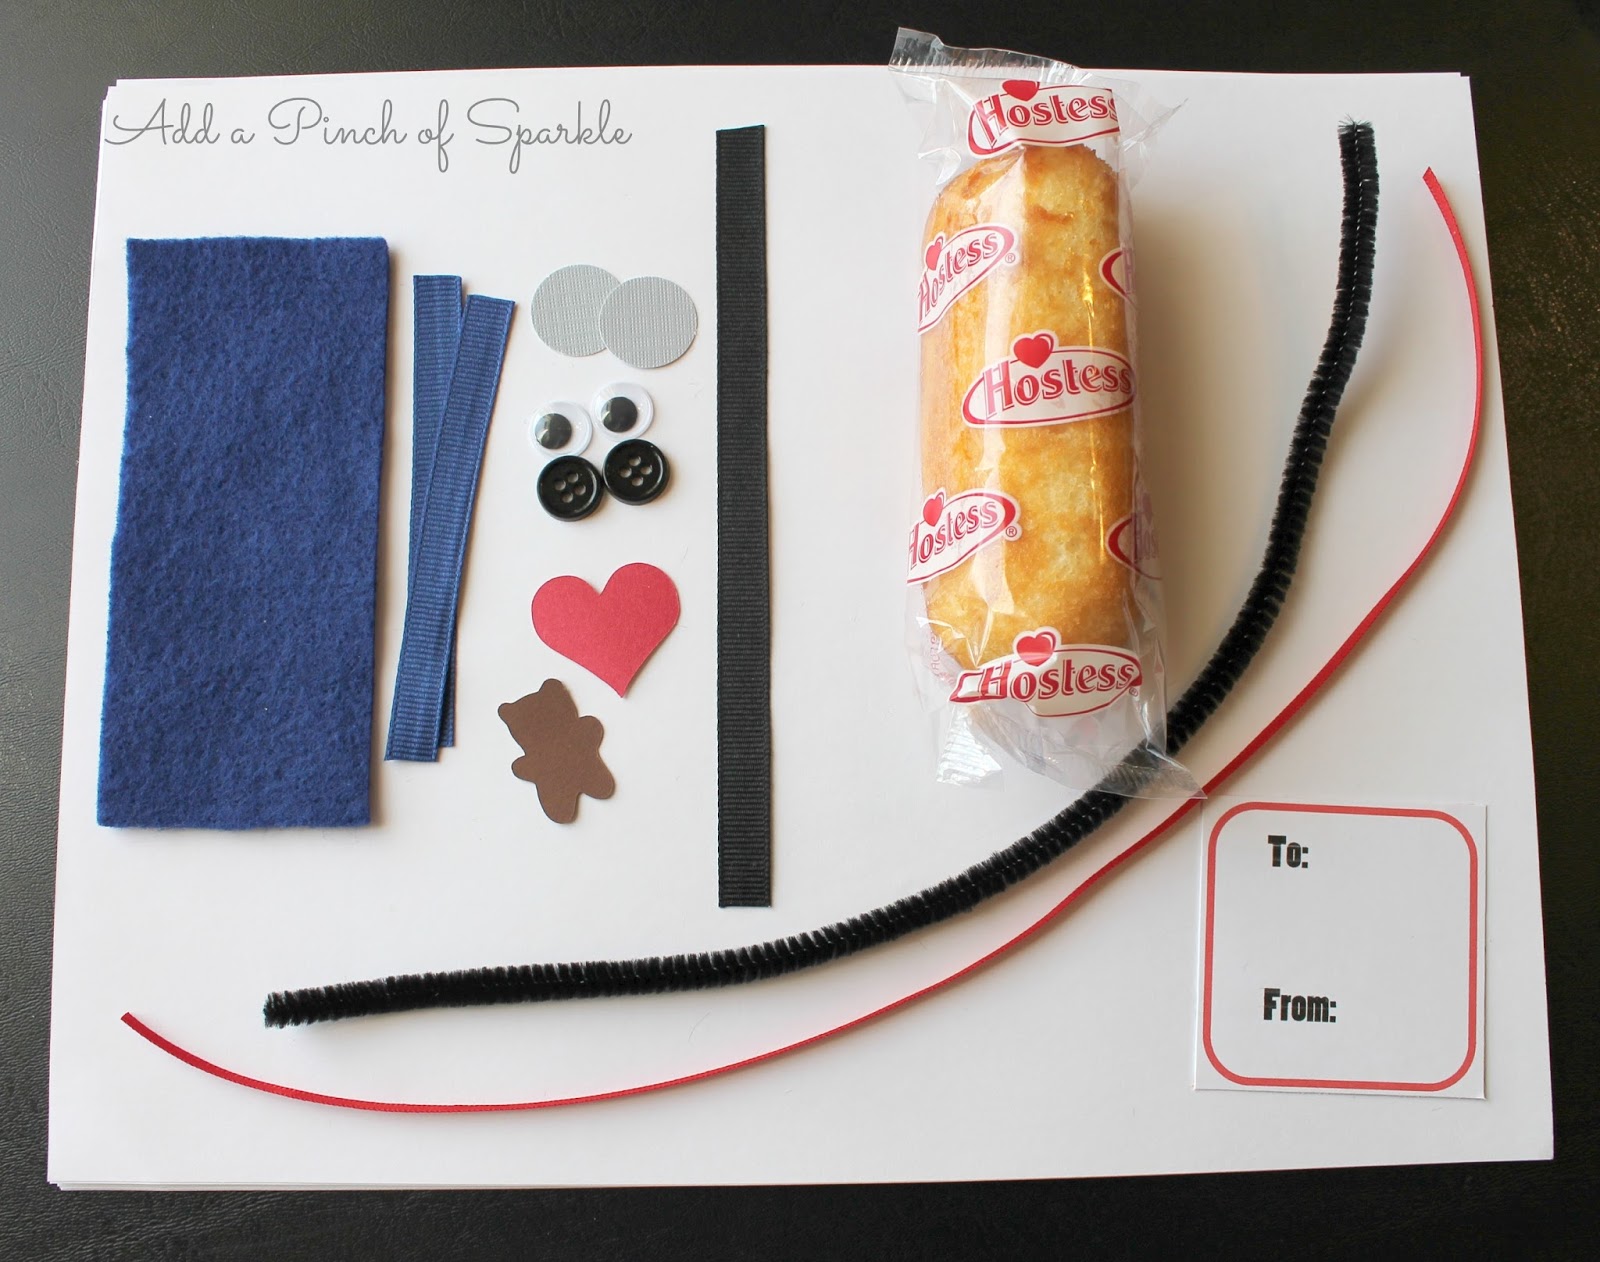
A Twinkie
A 2" x 4" rectangle of blue felt
Two 3 1/2" pieces of blue ribbon
1-2 circles of gray cardstock. I cut mine using a 3/4" circle punch
1-2 plastic googly eyes
2 black buttons
A 6" piece of black ribbon
Black pipe cleaner
Small red cardstock heart. I cut mine using my Cricut
Small brown cardstock bear. I also cut this with my Cricut
Red ribbon and gift tag
Glue gun and glue sticks (not pictured)

First, wrap the blue felt around the bottom of the Twinkie and glue in place in the front and back.

Next, glue one of the blue ribbons to the front and back of the Twinkie to make an overall strap. Repeat on the other side.

Wrap the black ribbon around the top of the Twinkie and glue in place in back.

Glue the gray circles to the black ribbon and add the eyes on top. Cut a small piece of pipe cleaner and bend it into the shape of a smile then glue it in place. Add a black button to each overall strap. Glue the heart to the overalls. For Bob you can add the teddy bear.

Stewart only has one eye. Bend some small pieces of pipe cleaner and glue them to the top of the Twinkie for his hair.

You can make Kevin's hair by gluing a few pieces of straight pipe cleaner to the top of the Twinkie.

Add a gift tag with some red ribbon and you have a cute and tasty Valentine treat!

No comments:
Post a Comment