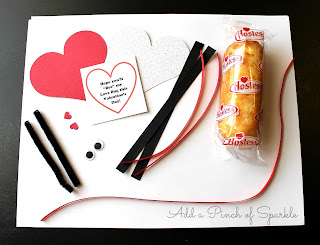
For an activity this week I put together these adorable Love Bug Twinkie Valentines. Here's a quick tutorial to show you how I did it!
Supplies:
A Twinkie
1 large red cardstock heart. I cut mine out with my Cricut.
1 large white cardstock heart (slightly smaller than the red one). I also cut this out with my Cricut and used some sparkly white cardstock.
2 small red cardstock hearts. I cut mine using a small heart paper punch.
2 googly eyes
Two 3" pieces of black pipe cleaner
Two 6" pieces of 3/8" width black ribbon
Two 6" pieces of 1/8" width red ribbon
Red ribbon and gift tag
Glue gun and glue sticks (not pictured)
Start by gluing one end of the black pieces of ribbon to the back of the Twinkie. Center a piece of red ribbon over the top of each black piece and glue in place.
Carefully wrap the ribbons around the Twinkie while keeping the red ribbon centered and glue in back.
Glue the pipe cleaners to the top of the Twinkie in a "V" shape. Glue the white heart to the back and add the red heart on top.
Turn the Twinkie over and add the googly eyes. Bend the tops of the pipe cleaners into little balls.
Glue the small red hearts to the top of the pipe cleaners.
And there you have it! A cute little Love Bug. I love how the Hostess logo has a heart that adds to the Valentine theme!
I added a little gift tag with some red ribbon. The tag reads:
Hope you'll "Bee" my Love Bug this Valentine's Day!
I love how these fun treats turned out. Almost too cute to eat. . . Almost!


No comments:
Post a Comment