Showing posts with label tutorial. Show all posts

Saturday, February 13, 2016

"Bee" My Love Bug Twinkie Valentine Tutorial


For an activity this week I put together these adorable Love Bug Twinkie Valentines. Here's a quick tutorial to show you how I did it!


Supplies:

A Twinkie
1 large red cardstock heart. I cut mine out with my Cricut.
1 large white cardstock heart (slightly smaller than the red one). I also cut this out with my Cricut and used some sparkly white cardstock.
2 small red cardstock hearts. I cut mine using a small heart paper punch.
2 googly eyes
Two 3" pieces of black pipe cleaner
Two 6" pieces of 3/8" width black ribbon
Two 6" pieces of 1/8" width red ribbon
Red ribbon and gift tag
Glue gun and glue sticks (not pictured)


Start by gluing one end of the black pieces of ribbon to the back of the Twinkie. Center a piece of red ribbon over the top of each black piece and glue in place.


Carefully wrap the ribbons around the Twinkie while keeping the red ribbon centered and glue in back.


Glue the pipe cleaners to the top of the Twinkie in a "V" shape. Glue the white heart to the back and add the red heart on top.


Turn the Twinkie over and add the googly eyes. Bend the tops of the pipe cleaners into little balls.


Glue the small red hearts to the top of the pipe cleaners.


And there you have it! A cute little Love Bug. I love how the Hostess logo has a heart that adds to the Valentine theme!


I added a little gift tag with some red ribbon. The tag reads:

Hope you'll "Bee" my Love Bug this Valentine's Day!

I love how these fun treats turned out. Almost too cute to eat. . . Almost!

Minion Twinkie Valentine Tutorial


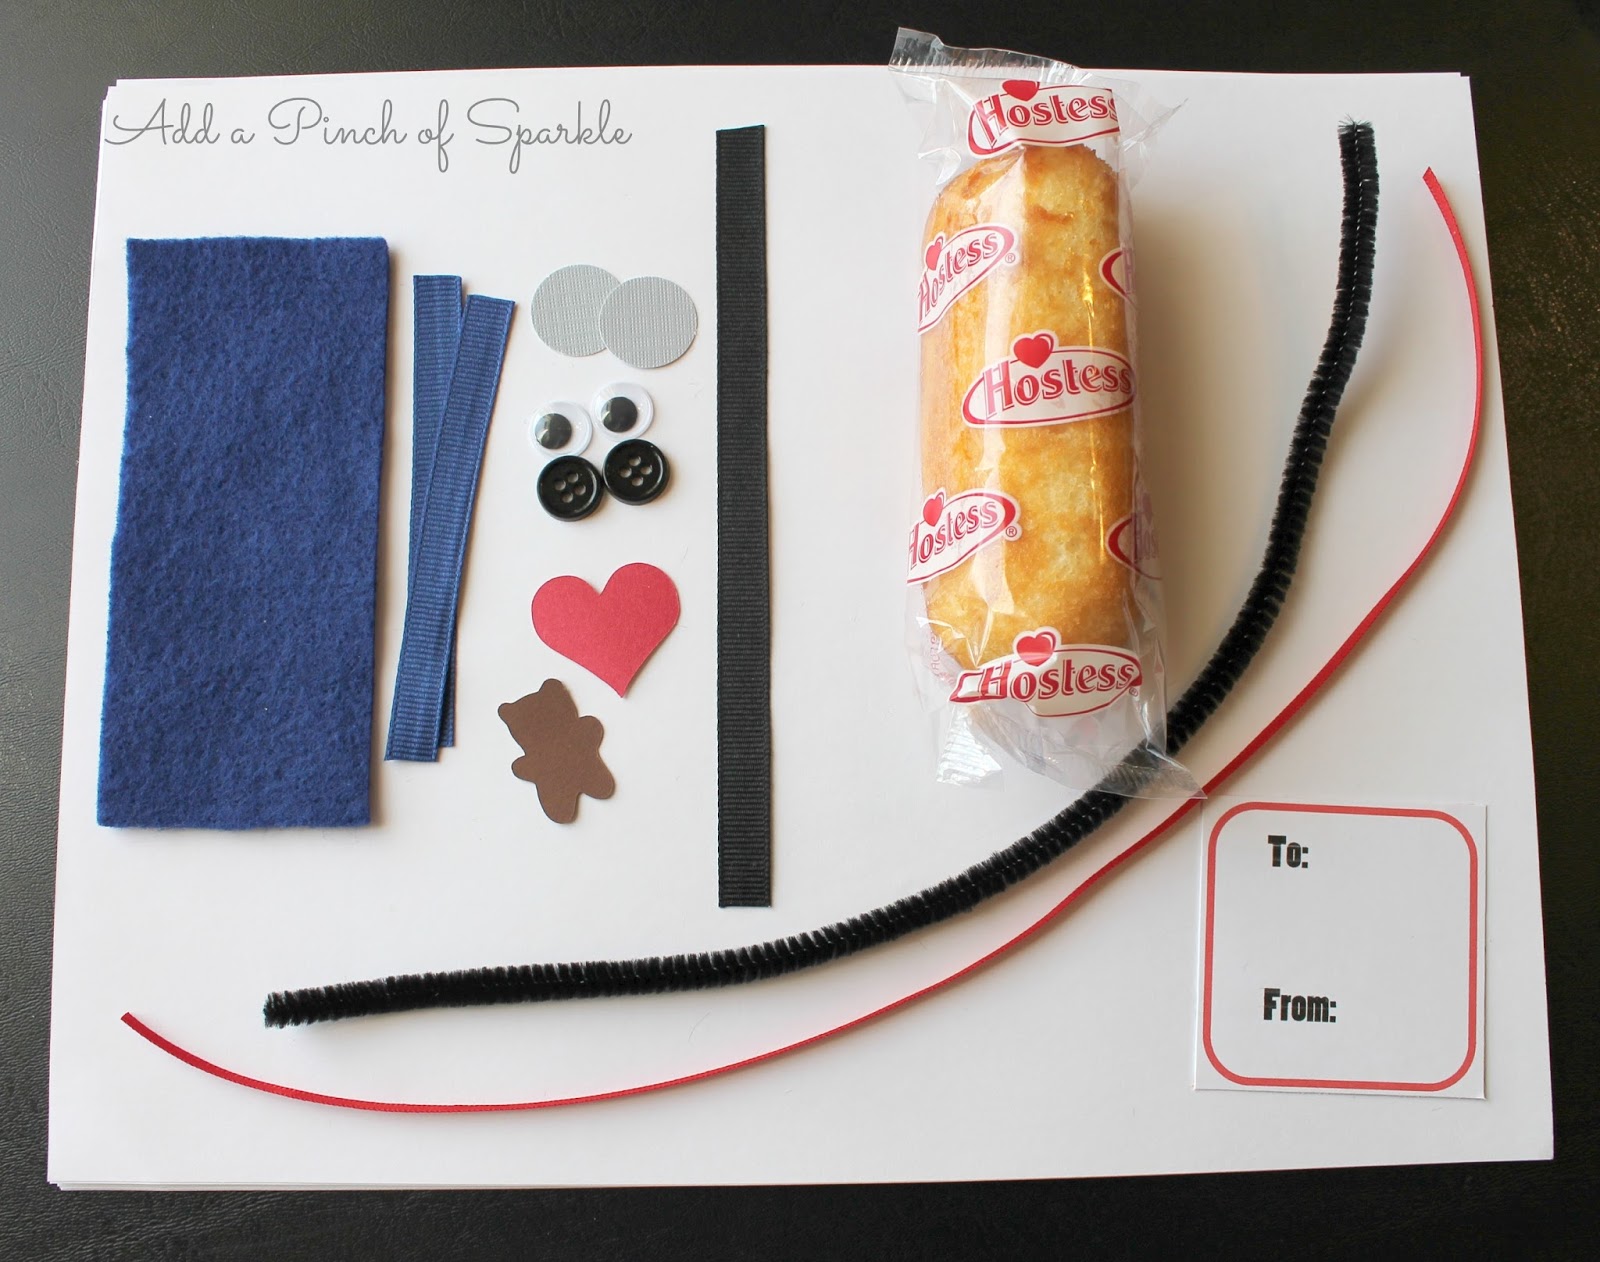
My daughter and I made these cute little Minion Twinkie Valentines for her class party. They were so quick and easy I put together a tutorial so you can make some too!


You will need:

A Twinkie
A 2" x 4" rectangle of blue felt 
Two 3 1/2" pieces of blue ribbon
1-2 circles of gray cardstock. I cut mine using a 3/4" circle punch
1-2 plastic googly eyes
2 black buttons
A 6" piece of black ribbon
Black pipe cleaner
Small red cardstock heart. I cut mine using my Cricut
Small brown cardstock bear. I also cut this with my Cricut
Red ribbon and gift tag
Glue gun and glue sticks (not pictured)


First, wrap the blue felt around the bottom of the Twinkie and glue in place in the front and back.


Next, glue one of the blue ribbons to the front and back of the Twinkie to make an overall strap. Repeat on the other side.


Wrap the black ribbon around the top of the Twinkie and glue in place in back.


Glue the gray circles to the black ribbon and add the eyes on top. Cut a small piece of pipe cleaner and bend it into the shape of a smile then glue it in place. Add a black button to each overall strap. Glue the heart to the overalls. For Bob you can add the teddy bear.


Stewart only has one eye. Bend some small pieces of pipe cleaner and glue them to the top of the Twinkie for his hair.


You can make Kevin's hair by gluing a few pieces of straight pipe cleaner to the top of the Twinkie.


Add a gift tag with some red ribbon and you have a cute and tasty Valentine treat!

Tuesday, May 27, 2014

Mickey and Minnie Treat Bag: Tutorial


I recently made some Mickey and Minnie Treat Bags for a Minnie Mouse themed birthday party. I got the inspiration for them by searching the Internet. Based on the ideas I found, I put together my own version. I used my Cricut, but this could definitely be done without one. Here are the details if you are interested in making your own Mickey and Minnie treat bags!


Here are the supplies I used:

Cricut with Mickey and Friends cartridge
Black, white, and red cardstock
Black treat bags found at Hobby Lobby
3/4" circle punch
1" circle punch
2" oval punch
Paper trimmer


I started both bags by cutting out a 5 x 6" rectangle from red cardstock.


Next, I cut ears for both bags at 7 3/4" using the "Mickey Icon Shift" key from the Mickey and Friends cartridge. I cut Minnie's bow at 4 1/2" using the "Minnie 4 Icon" key.

I saw lots of bags made with just circles for the ears which is a good option if you don't have a Cricut or similar cutting machine!


For Minnie's polka dots I used the 3/4" punch to make 9 circles for her bow and the 1" punch to make 8 circles for her skirt.

For Mickey's pants I used the 2" oval punch to make two buttons.


Finally, I glued everything together. I filled the bags with some fun little goodies like a coloring book, crayons, and stickers. 

There you have it! These bags were so easy to make and turned out so cute. The kids loved them!

Have you ever attempted to make your own treat bags? How did it go?

Friday, May 16, 2014

Minnie Mouse Wreath: Tutorial


I have been sharing some of the crafts I made for my 4-year-old's Minnie Mouse Themed Birthday Party. This is a wreath I made in the shape of Minnie Mouse. It was actually really simple. 


Here are the supplies I used:

1- 12" box wire wreath frame (found at JoAnn's)
2- 6" box wire wreath frames (also from JoAnn's)
3 rolls of black wired burlap ribbon. I originally bought two rolls, then had to go back to the store for a third. I found the ribbon at Michael's.
1.5" red and white polka dot ribbon (found at Hobby Lobby)
Packing tape
Pliers, needle and thread, and glue gun (not pictured)


The wreath frames were held together by pieces of wire that were bent up around the inner and outer circles. This is a little complicated to explain, but I will do my best: I pulled open the outer bends of two wreaths with pliers and then slid the outer circle of each wreath inside the opposites wreath's wire bend then pinched them back closed. In the picture you can see that both wreaths are secured by both wires.


I attached both 6" wreaths to the 12" wreath to form the Minnie head with the wires as described above and then secured it with some packing tape to make sure it all stayed in place.


Next, I took the end of the burlap ribbon, slid it up from the back of the wreath, and tied a knot around the outer wreath wire. (This picture was taken from the back of the wreath).


Next, I pulled the ribbon up between the two outer most wires and made a little loop. The size of the loop depends on how full you want the wreath to be. My loop was about the width of two fingers. Next, you twist the loop sideways to hold it in place. The next loop will be between the middle two wires and then the following loop will be between the two inner most wires. You will repeat the loops and twists, moving from one space in the wreath to the next, then down to the next row. You always want each new loop to be separated from the last one by a wire so that it will all stay together. This may mean jumping around a little bit as you work your way around the wreath. For example, as you move down to the next row, you will want to make your loop between the middle two wires instead of making a loop directly below the previous one. (I hope that all made sense!)


Here is the wreath taking shape. Continue working around the entire wreath until everything is covered.


For the bow I took my ribbon and made two big loops.


Then I added four more loops.


To keep it all together I hand stitched it down the middle.


Next, I pulled the thread to gather the loops and wrapped the thread around the center tightly.


I took another little piece of ribbon, folded it in thirds, and wrapped it around the center of the bow to cover the thread. I secured it in back with a little hot glue.


I took some thread through the back of the bow and tied the bow in place on the wreath.

This wreath was really simple and it looked great hanging on our front door!

Have you ever made a burlap ribbon wreath? What occasion did you make it for?

Monday, April 28, 2014

Quick and Easy Minnie Mouse Party Invitation: Tutorial


I recently made some Minnie Mouse themed invitations for a birthday party. I only needed a few so I decided to make them myself. They ended up being really quick and easy so I thought I would share how I made them.


First, here are the supplies I used:
White and Black Cardstock
Paper Trimmer (scissors work fine too)
1/8" Red Ribbon
7/8" Red and White Polka Dot Ribbon
Mickey Mouse Hole Punch (I found this at Hobby Lobby)
Craft Glue (I used a few different kinds, but all you really need is one)
Scissors (not pictured, but I'm sure you know what they look like)


I started by typing up the invitations in Word. I made a text box that was just under 4" x 6" and added my text. I also added a border so I would have a guide for where to cut. You can download a "Minnie Mouse" font, but I just inserted the image of the font directly into my text box.

After I printed the text, I cut them out using my paper trimmer just inside of the black line so I had a clean, white edge.

Next, I cut some black cardstock for the background to just under 4.5" x 6.5".


I used the extra scraps of black cardstock to punch out some Mickey silhouettes.


Next, I cut the ribbon. The polka dot ribbon was about 5" and the red ribbon was about 4 3/4".


I used a tape runner to put a little double sided tape on the back of the polka dot ribbon.


Then I secured the ribbon to the front of the text sheet.


I wrapped the ends of the ribbon around the white cardstock and glued it in place with some tacky glue. Then I added some glue to the edges of the white cardstock and centered it onto the black cardstock.


I tied the red ribbon in a bow and glued it in place with some hot glue. I used hot glue because it would hold the bow in place better, especially because it isn't flat.


Then I glued the little Minnie Mouse on the invitation and ta-da! Done! I think they turned out pretty cute!

Have you made party invitations before? How did it go?