Showing posts with label kids. Show all posts

Friday, February 26, 2016

Leap Day Frog Treats


It's my daughter's turn to bring snack for school on Monday and because Monday is Leap Day we just HAD to do something extra special! This is what we came up with:


Oatmeal Creme Pie Frog Treats! They are so cute and so easy to make that I am SURE you want to make some yourself! Here's how we did it:


Supplies:
A 2" x 3" piece of green cardstock, folded in half
Two 1 3/4" green cardstock circles
Two 1" white cardstock circles
Two 3/4" black cardstock circles
Two 1" x 4" strips of green cardstock, accordion folded
Two 2" green cardstock ovals
1 Oatmeal Creme Pie (I used Little Debbie brand)
hot glue gun and glue sticks (not pictured)
*note* I used various sizes of paper punches to cut the circles and ovals


First, glue the 2" x 3" piece of cardstock to the oatmeal creme pie. 
*Hint* I glued it along the seam on the wrapper to help ensure the hot glue didn't melt through the plastic.


Next, glue the black, white and green circles together to form eyes and then attach them to the front of the green cardstock.


Finally, glue an oval to the bottom of each accordion folded strip and then attach the top of the strips to the bottom of the pie. 
*Hint* I put the glue on the cardstock first and let it cool for just a second before attaching it to the wrapper.


And that's it! An adorable frog treat!


Don't you just want to eat it up!?!


We made them in several different shades of green.


I also added a little tag that says:

Hip Hop Hooray!
Happy Leap Day!


My daughter is so excited to take these to school on Monday! How about you? Do you have any fun Leap Day treats or activities planned?

Saturday, February 13, 2016

"Bee" My Love Bug Twinkie Valentine Tutorial


For an activity this week I put together these adorable Love Bug Twinkie Valentines. Here's a quick tutorial to show you how I did it!


Supplies:

A Twinkie
1 large red cardstock heart. I cut mine out with my Cricut.
1 large white cardstock heart (slightly smaller than the red one). I also cut this out with my Cricut and used some sparkly white cardstock.
2 small red cardstock hearts. I cut mine using a small heart paper punch.
2 googly eyes
Two 3" pieces of black pipe cleaner
Two 6" pieces of 3/8" width black ribbon
Two 6" pieces of 1/8" width red ribbon
Red ribbon and gift tag
Glue gun and glue sticks (not pictured)


Start by gluing one end of the black pieces of ribbon to the back of the Twinkie. Center a piece of red ribbon over the top of each black piece and glue in place.


Carefully wrap the ribbons around the Twinkie while keeping the red ribbon centered and glue in back.


Glue the pipe cleaners to the top of the Twinkie in a "V" shape. Glue the white heart to the back and add the red heart on top.


Turn the Twinkie over and add the googly eyes. Bend the tops of the pipe cleaners into little balls.


Glue the small red hearts to the top of the pipe cleaners.


And there you have it! A cute little Love Bug. I love how the Hostess logo has a heart that adds to the Valentine theme!


I added a little gift tag with some red ribbon. The tag reads:

Hope you'll "Bee" my Love Bug this Valentine's Day!

I love how these fun treats turned out. Almost too cute to eat. . . Almost!

Minion Twinkie Valentine Tutorial


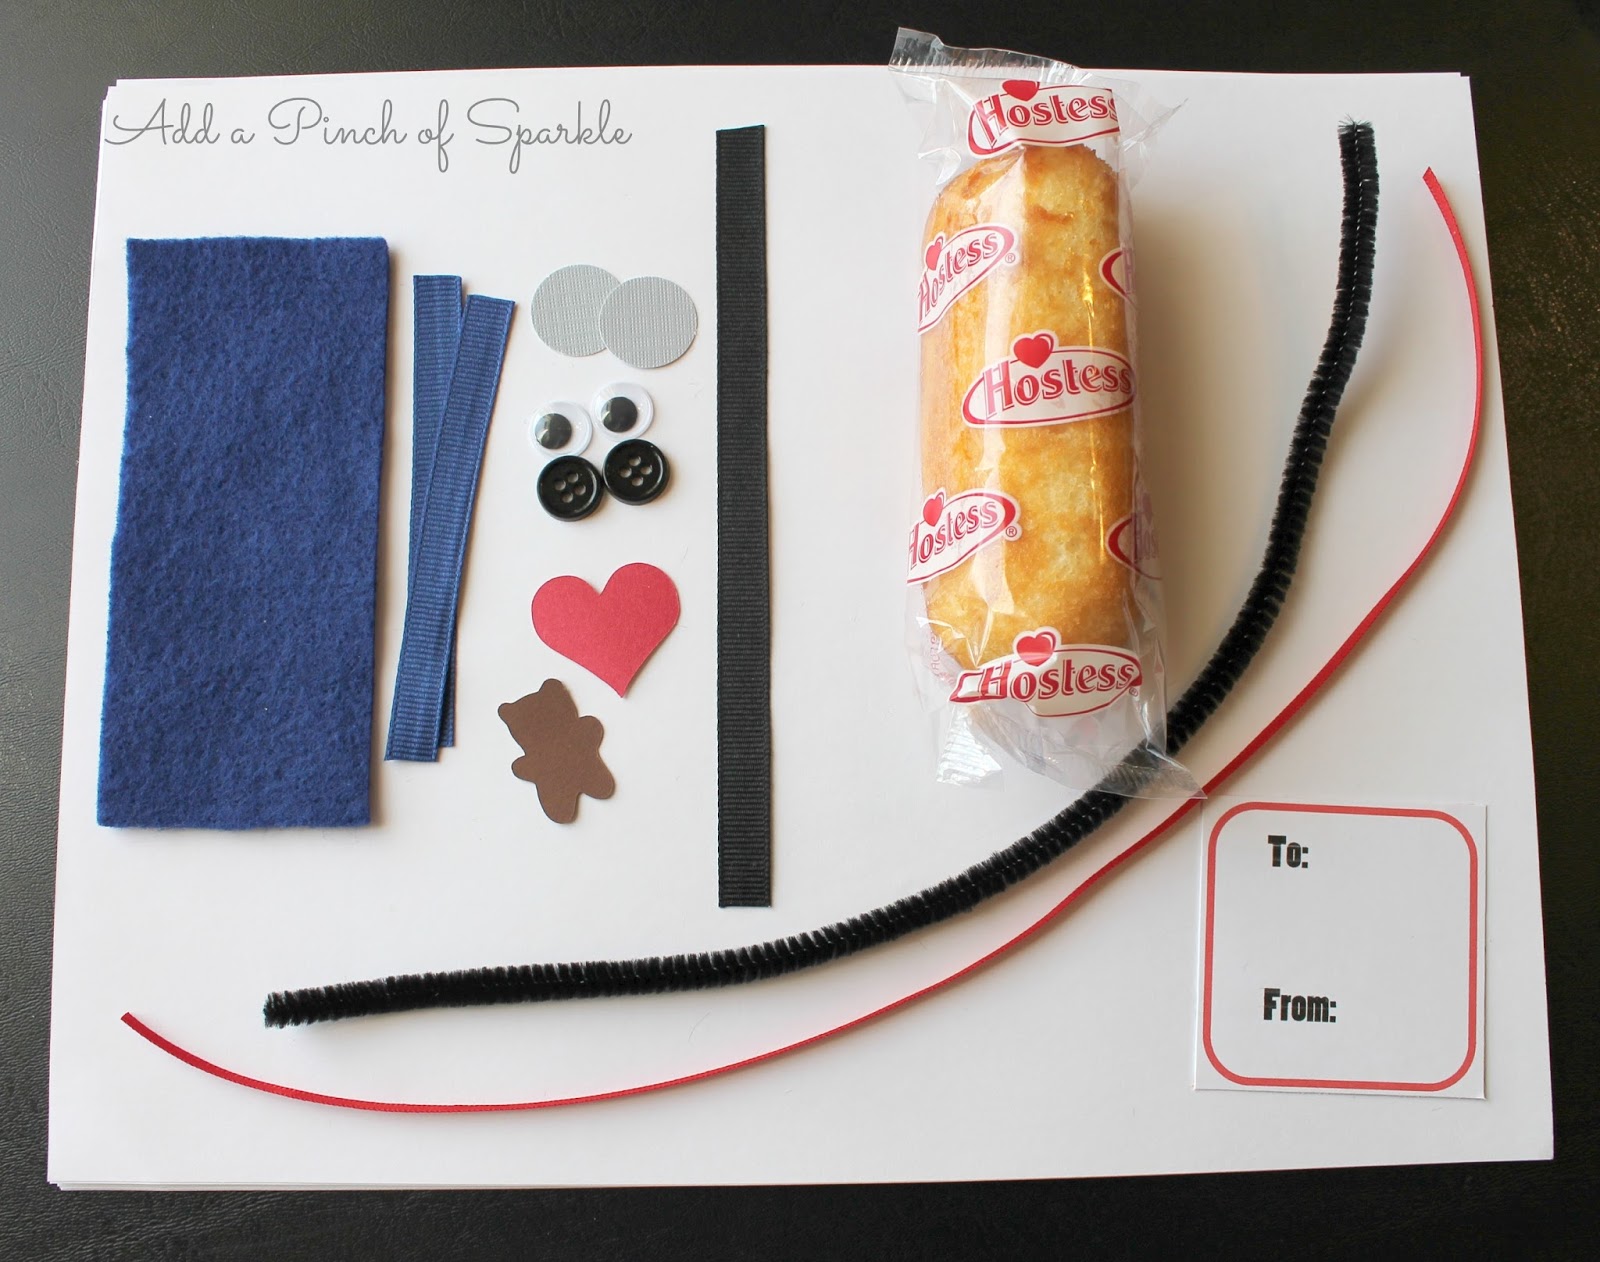
My daughter and I made these cute little Minion Twinkie Valentines for her class party. They were so quick and easy I put together a tutorial so you can make some too!


You will need:

A Twinkie
A 2" x 4" rectangle of blue felt 
Two 3 1/2" pieces of blue ribbon
1-2 circles of gray cardstock. I cut mine using a 3/4" circle punch
1-2 plastic googly eyes
2 black buttons
A 6" piece of black ribbon
Black pipe cleaner
Small red cardstock heart. I cut mine using my Cricut
Small brown cardstock bear. I also cut this with my Cricut
Red ribbon and gift tag
Glue gun and glue sticks (not pictured)


First, wrap the blue felt around the bottom of the Twinkie and glue in place in the front and back.


Next, glue one of the blue ribbons to the front and back of the Twinkie to make an overall strap. Repeat on the other side.


Wrap the black ribbon around the top of the Twinkie and glue in place in back.


Glue the gray circles to the black ribbon and add the eyes on top. Cut a small piece of pipe cleaner and bend it into the shape of a smile then glue it in place. Add a black button to each overall strap. Glue the heart to the overalls. For Bob you can add the teddy bear.


Stewart only has one eye. Bend some small pieces of pipe cleaner and glue them to the top of the Twinkie for his hair.


You can make Kevin's hair by gluing a few pieces of straight pipe cleaner to the top of the Twinkie.


Add a gift tag with some red ribbon and you have a cute and tasty Valentine treat!

Friday, February 12, 2016

Minion Valentine Boxes


My daughter needed to bring a decorated box to school to hold her Valentines and she requested that we decorate her box like a Minion. I only have one kid in school at this point, but the other kids were so excited about the Minion boxes that we had to make one for each of them as well. I think they turned out pretty cute.


This is Stewart. We started out with an empty box and covered it in yellow, blue, and black cardstock. We added some yellow arms, black hands, and blue overall straps with some white buttons.


This is Bob. His eyes are made from cardstock cut with varying sizes of circle paper punches. His teddy bear was cut with my Cricut using the Doodlecharms cartridge. The teddy bear's eyes are made of buttons. His heart was also cut with my Cricut using the Plantin SchoolBook cartridge.


This is Kevin. His hair and smile are made out of black pipe cleaners. I attached everything together using a glue gun.

These boxes were easy to put together and are 100% kid-approved!

Wednesday, October 28, 2015

Halloween Pumpkin Bowling


For my daughter's class Halloween party I volunteered to bring a game. A quick little search on Pinterest and I got the idea for Pumpkin Bowling! Because my daughter's Kindergarten class loved it and because it was quick and easy to make, I thought I would share the details here!

Supplies Needed:
10 tin cans
Felt in a variety of Halloween colors
Scissors
Glue gun and glue sticks
Small pumpkin

Directions:
1. Wash out your empty cans
2. Cut a strip of felt to wrap around each can (I cut mine long enough to overlap the felt a little in the back)
3. Glue the felt in place around the can
4. Cut a circle of felt to fit the bottom of the can
5. Glue the felt to the bottom of the can
4.  Turn the cans over so the felt circle is now on top and decorate each can to look like your favorite Halloween character! Really, with just a few simple shapes anyone - whether you are "crafty" or not - can make a variety of spook-tacular Halloween friends!


Two black ovals and one black circle on a white background make a simple and perfect ghost.


Didn't this Frankenstein turn out adorable? He's my favorite!


Just some circles and triangles plus a couple wings make this cute little bat!


Here's a close-up of the happy Jack-o'-Lantern.


This cat was my daughter's favorite. Triangles, circles, and some simple strips of felt for the whiskers.


You can set the cans up like traditional bowling pins or, for a more simple game, you can stack them on top of each other. Roll a small pumpkin towards them and see how many cans you can knock down!

Happy Bowling!

P.S. If you haven't been saving your tin cans and you need 10 of them fast, you can try out my recipe for 12-can Slow Cooker Taco Soup found here.

Tuesday, September 15, 2015

Spa Party

This past weekend we had a Mother-Daughter Spa Party! We had some friends over, ate some yummy food, and did our nails. To put the party together, I gathered some inspiration and ideas from Pinterest and then added some of my own touches. Here are some pictures from the party!

This is a loofah and eye mask wreath I made. I'll share all the details of how to make one yourself in an upcoming post- it's super easy!

I had some little lounge chairs set up under a "Relax" banner I made with my Cricut.

All the girls had the chance to decorate their own flip flops. I had several pairs of girls' flip flops available and an assortment of ribbon, jewel stickers, and foam stickers for the girls to use.

I set up a table for the girls to do a little pampering. The moms had a table as well, just in a bigger size! The table and chairs are covered with plastic tablecloths and I tied a little tulle bow around the chairs. Each girl's station had a mirror (found at Dollar Tree), a little basin with water to wash her hands (also found at Dollar Tree), some hand scrub, a wash cloth tied with ribbon to dry her hands, and some hand cream.

The hand scrub is a sugar scrub I made. You can find the instructions here. We found that the sugar settles to the bottom over time, so you'll want to stir it right before you put it on. The hand cream is some Vanilla Bean Noel lotion from Bath & Body Works. I love that the scrub is pink and the cream is green to go with the color scheme of the party. I didn't even plan that! The little cups were found at Dollar Tree. I made the labels for the scrub and cream on my computer and cut them out with a 1" circle punch then glued them to the cups.

I decorated the refreshment table with some loofah "flowers".

Here is the refreshment table! Again, I made the banner with my Cricut. The little "eye masks" in the background are actually something called "bath time kneeling pads" that I found at Dollar Tree.

We had "Spa Water" to drink. I created the pink labels on my computer and cut them out with a 2" scallop punch then glued them to the green water bottle labels that I cut with my Cricut.

Here are some "Bubble Bath Treats" I made. You can find the recipe here. I altered the original recipe by using just a regular cake mix and the ingredients needed on the package and topping it with marshmallow frosting. Then I added some mini marshmallows and a Teddy Graham and you have a cute little bear in a bubble bath!

For each treat I made a label on my computer, cut it out with a 1 3/4" circle punch, glued it on some card stock cut with a 2" scallop punch, and added some fun make-up embellishments I cut out with my Cricut. The label holders are foam rollers.

Next are the "Nail Polish" treats. These are made with strawberry flavored marshmallows and Tootsie Rolls held together by a toothpick.

These "Nail File" treats are vanilla sugar wafer cookies.

Here are some "Flip Flop Cucumber Sandwiches"!

Here's a closer look. I found the inspiration for these here, but I altered the idea a little and they ended up looking more like these here (this link also includes step-by-step instructions). To make mine look like flip flops I used blueberries and sliced cucumber peel. You can find the recipe for the filling here. I altered the recipe by mixing chopped cucumber into the filling instead of adding a slice of cucumber to each sandwich.

Finally, we had "Pig Tails in a Blanket". It's the classic snack food with a fun little twist on the name.

My girls had a wonderful time at the spa party and it was fun to put it together too! I hope you enjoyed the little "tour" of our party!

Have you planned any themed parties recently? What did you do?

P.S. If you are planning a spa party soon, I found some cute printable invitations here!