Showing posts with label Valentine's Day. Show all posts

Saturday, February 13, 2016

"Bee" My Love Bug Twinkie Valentine Tutorial


For an activity this week I put together these adorable Love Bug Twinkie Valentines. Here's a quick tutorial to show you how I did it!
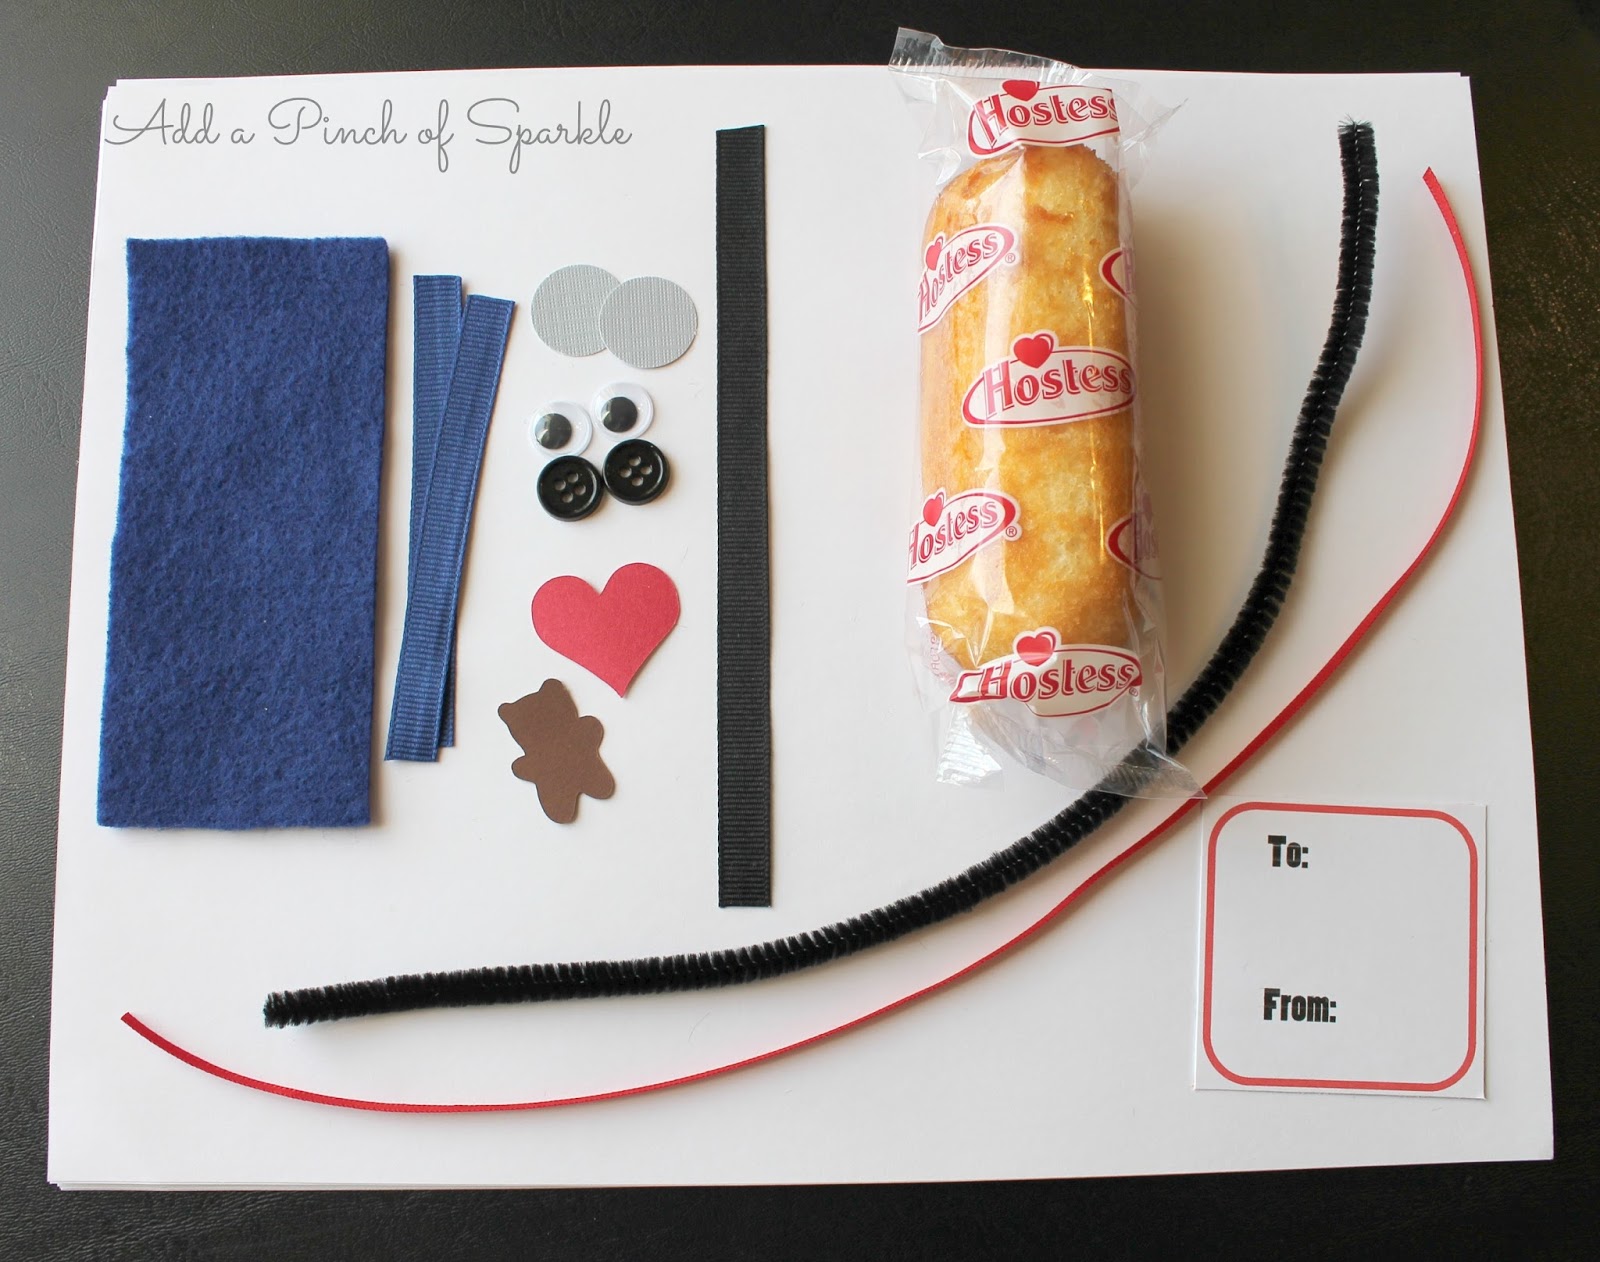

Supplies:

A Twinkie
1 large red cardstock heart. I cut mine out with my Cricut.
1 large white cardstock heart (slightly smaller than the red one). I also cut this out with my Cricut and used some sparkly white cardstock.
2 small red cardstock hearts. I cut mine using a small heart paper punch.
2 googly eyes
Two 3" pieces of black pipe cleaner
Two 6" pieces of 3/8" width black ribbon
Two 6" pieces of 1/8" width red ribbon
Red ribbon and gift tag
Glue gun and glue sticks (not pictured)


Start by gluing one end of the black pieces of ribbon to the back of the Twinkie. Center a piece of red ribbon over the top of each black piece and glue in place.


Carefully wrap the ribbons around the Twinkie while keeping the red ribbon centered and glue in back.


Glue the pipe cleaners to the top of the Twinkie in a "V" shape. Glue the white heart to the back and add the red heart on top.


Turn the Twinkie over and add the googly eyes. Bend the tops of the pipe cleaners into little balls.


Glue the small red hearts to the top of the pipe cleaners.


And there you have it! A cute little Love Bug. I love how the Hostess logo has a heart that adds to the Valentine theme!


I added a little gift tag with some red ribbon. The tag reads:

Hope you'll "Bee" my Love Bug this Valentine's Day!

I love how these fun treats turned out. Almost too cute to eat. . . Almost!

Minion Twinkie Valentine Tutorial


My daughter and I made these cute little Minion Twinkie Valentines for her class party. They were so quick and easy I put together a tutorial so you can make some too!


You will need:

A Twinkie
A 2" x 4" rectangle of blue felt 
Two 3 1/2" pieces of blue ribbon
1-2 circles of gray cardstock. I cut mine using a 3/4" circle punch
1-2 plastic googly eyes
2 black buttons
A 6" piece of black ribbon
Black pipe cleaner
Small red cardstock heart. I cut mine using my Cricut
Small brown cardstock bear. I also cut this with my Cricut
Red ribbon and gift tag
Glue gun and glue sticks (not pictured)


First, wrap the blue felt around the bottom of the Twinkie and glue in place in the front and back.


Next, glue one of the blue ribbons to the front and back of the Twinkie to make an overall strap. Repeat on the other side.


Wrap the black ribbon around the top of the Twinkie and glue in place in back.


Glue the gray circles to the black ribbon and add the eyes on top. Cut a small piece of pipe cleaner and bend it into the shape of a smile then glue it in place. Add a black button to each overall strap. Glue the heart to the overalls. For Bob you can add the teddy bear.


Stewart only has one eye. Bend some small pieces of pipe cleaner and glue them to the top of the Twinkie for his hair.


You can make Kevin's hair by gluing a few pieces of straight pipe cleaner to the top of the Twinkie.


Add a gift tag with some red ribbon and you have a cute and tasty Valentine treat!

Friday, February 12, 2016

Minion Valentine Boxes


My daughter needed to bring a decorated box to school to hold her Valentines and she requested that we decorate her box like a Minion. I only have one kid in school at this point, but the other kids were so excited about the Minion boxes that we had to make one for each of them as well. I think they turned out pretty cute.


This is Stewart. We started out with an empty box and covered it in yellow, blue, and black cardstock. We added some yellow arms, black hands, and blue overall straps with some white buttons.


This is Bob. His eyes are made from cardstock cut with varying sizes of circle paper punches. His teddy bear was cut with my Cricut using the Doodlecharms cartridge. The teddy bear's eyes are made of buttons. His heart was also cut with my Cricut using the Plantin SchoolBook cartridge.


This is Kevin. His hair and smile are made out of black pipe cleaners. I attached everything together using a glue gun.

These boxes were easy to put together and are 100% kid-approved!

Monday, February 17, 2014

Forrest Gump-Themed Date Night Basket


I thought a lot about what to get my husband for Valentine's Day. While I was browsing the $5 movie bin at Walmart recently, I got a great idea. I picked out a movie, bought some fun things that went with the movie's theme, put together a quick craft (of course), put it all in a basket and there you have it- a movie-themed date night basket. This date night basket is especially good for us because we have four kids under four so we don't get out that often, but like to make time every once in a while to have a "date night" at home.

Here's what I put in our Forrest Gump-Themed Basket:


My favorite part was this cute little sign I made. It's not a direct quote from the movie and it will be of no use during our date night, but I thought it was cute and will also make a good springtime decoration!


The basket starts with dinner. To stay with the theme of Forrest Gump, I got the supplies for a shrimp pasta dish. I put the pasta and the recipe in the basket. We can make the pasta dish together then watch the movie after.


I added some movie snacks: popcorn, Dr. Pepper, and a box of chocolates. The popcorn is just an essential movie snack and the other two go with the theme. I thought I was pretty clever when I thought of those two. 

I love this idea and I am thinking there are endless possibilities for movie-themed date night baskets for future at-home dates!

How was your Valentine's Day? Did you give your sweetheart anything special?

P.S. A big "thank you" to my Facebook friends who gave me some suggestions on what to add to the basket!

Friday, February 14, 2014

Valentine's Day Mantel


I have been working on lots of Valentine's Day crafts, now you get to see them all displayed on my mantel. I really like how it turned out. I think all the different crafts and colors came together perfectly!


The final crafts I made were some yarn wrapped letters. I took pictures thinking that I was going to show how I did it, but honestly the project was a lot harder than it looks. I am a perfectionist and I had to start over at least ten times because the yarn was slipping out of place or clumping up. If I hadn't already spent so much time on it, I would have just thrown in the towel! I like how it turned out, but not that it was my arch nemesis for a couple of days until I got it figured out and completed!


Here are a couple of my final touches. I wrapped lace around some of my red, pink, and cream candles and then tied on some cute little heart buttons I found with raffia or jute ribbon.


The left side.


The right side.


The entire mantel. What do you think?

If you want details on any of the crafts you can find them here: "Hugs & Kisses blocks", button heart, ribbon wreath, Scrabble "love" blocks, Valentine's Day countdown.

Hope you have a wonderful Valentine's Day! Do you have any fun plans with your family or sweetheart?

Thursday, February 13, 2014

"Hugs & Kisses" Valentine's Blocks


Here's another craft that I think turned out really cute, my "Hugs & Kisses" blocks. Here's how I made them:

Supplies:
*Wooden blocks
*Sand paper
*Paint (optional, I didn't use any) and paint brush
*Cardstock
*Mod Podge and a paint brush
*Ribbon


For me, the best place to get wood blocks is Hobby Lobby. They sell bags of random wood pieces (I think they are actually called "A Bag of Wood") for about $3 with a coupon. I don't have a saw so this is the easiest way I have found to make these cute blocks. Because every "Bag of Wood" is different I have to look through the bag and see what I think will look good together. It takes a couple minutes for the "puzzle" to come together, but it always does. Also, no two project will ever be alike, which I think adds to the fun!

Once I have my blocks, I sand them.

Next, add a couple coats of paint. I usually use the little bottles of acrylic paint you find at craft stores. For this project I decided not to paint the blocks so they would match the "natural" theme my decorations have taken on {see here and here} and I thought it still turned out pretty cute!


Next, I cut my cardstock. I used my Cricut to cut out the letters. Then I traced the blocks and cut the paper a little smaller so you could see the wood around the edges. With the "H" and "G" I cut an additional piece, again a little smaller than the first.


Next, I used Mod Podge to adhere the cardstock to the block. I did this one layer at a time and let the Mod Podge dry between each layer.


I added a final coat of Mod Podge to the top of the blocks because I like the look it gives when it dries.


Once everything was dry, I added a couple bows. Did you notice how the heart cardstock and the bows match? I LOVE it!


The finished project! I love how it turned out!

Have you made a block craft before? What did it say?

Wednesday, February 12, 2014

5-minute Scrabble "Love" Blocks


Ok. So, honestly this took me more like 10 minutes to do. My husband always teases me that it takes me at least twice as long to do something as it should. So, if I could get these cute little blocks done in 10 minutes, then I would expect that everyone else can certainly get them done in 5.


These are the supplies I used. I had everything on hand which was really nice, basically a free craft. Yay! I had the 1-1/4" blocks left over from a previous project and I used Sharpies for this, but you could certainly use paint if you'd rather. I also used my Cricut to make a stencil for myself. You could do this freehand, but I didn't trust myself to not mess up- so stencil it was.


All you have to do is trace the letters on the blocks, fill them in with the Sharpie, and done! 


Just tie them up with a cute little bow and put them on display!

What do you think? How long do you think this craft would take you?